From Zero to Swinging in 3 Minutes: Illustrated Outdoor Hammock Setup Guide

Remember the first time you faced a confusing pile of nylon fabric, a tangle of ropes, and a few buckles? You wanted to hang up your outdoor hammock and enjoy some leisure time, but instead, you spent 20 minutes battling tangled lines. Finally, the curve looked all wrong—either too tight or feeling like you’d flip out… That sense of frustration has kept many people away from the joy of hammocking.
The good news: it doesn’t have to be this complicated. Modern, well-designed outdoor hammocks are built to be as effortless and intuitive as the experience they provide. Today, we aren’t talking about buying materials; we are focusing on solving one practical problem: how to hang and pack your hammock like a pro in minutes—zero stress, zero confusion.
Are you ready? Follow this step-by-step guide, and you will say goodbye to setup anxiety and quickly become a “Hammock Master” in the eyes of your friends.
Step 1: Ready to Use—Meet Your “Teammates”
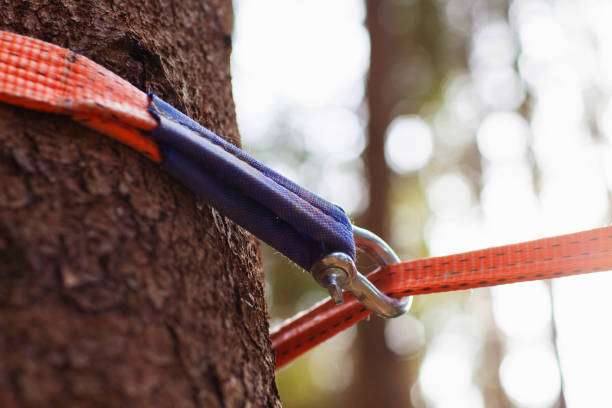
First, take the hammock completely out of its portable bag and spread it on the ground. A typical modern outdoor hammock system usually includes:
- Hammock Body: That soft piece of primary fabric.
- Suspension System: This could be two ropes with non-slip tree straps or an integrated system with aluminum carabiners and high-strength climbing ropes.
- Portable Storage Bag: It’s not just a bag; it’s your best assistant during storage.
Take a minute to see how they connect. Understanding your gear is the first step to success.
The Core Secret: The Golden Rule of 3-Minute Setup
The core goal of installing a hammock is not to tie it “tight,” but to hang it “right.” Remember this golden rule: you are pursuing an elegant curve, not a drum-tight surface.
Step One: Find the Perfect Anchors
Find two healthy, sturdy trees (or solid posts) spaced about 3 to 4.5 meters apart. Always use wide, non-slip tree straps! Wrap them once around the tree and buckle them. This not only protects the bark but is also a necessity for safety and environmental protection.
Step Two: Connection and Hanging
Connect the ropes or buckles at both ends of the hammock to the loops on the tree straps. Now, here is the crucial part: don’t rush to tighten them. Initially, the hammock can be hung lower and looser.
Step Three: Adjust the “Smile Curve”
After hanging, press down on the center of the hammock with your hand. The ideal state is when the center point drops to about your hip height under pressure, forming a soft, “smile-like” arc.
- If it’s too tight, it will be uncomfortable and unstable.
- If it’s too loose: You’ll almost touch the ground and struggle to get up.
Adjust the buckles on the tree straps to fine-tune this arc until you find the perfect ‘smile.’
Congratulations! You’re done. Once mastered, this process can be completed in under 3 minutes. Now, you can enjoy your aerial seat with the coolest posture.
Why the “Ultralight Travel Hammock” is the Perfect Choice for Quick Starts
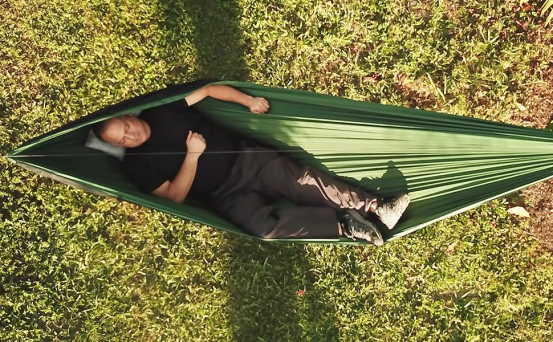
If you hate complexity and pursue efficiency, or often want a quick rest during hiking or road trips, an ultralight travel hammock designed for convenience will be your perfect match.
The design philosophy of this type of hammock is to “keep it simple to the end.” Its suspension system is often extremely optimized, using pre-installed high-strength climbing ropes and lightweight aluminum hooks, almost eliminating the need for knots. You only need to complete the intuitive actions of “wrap, buckle, and hook,” and a stable suspension is finished.
For beginners, this integrated design greatly reduces the learning cost. You don’t need to be a knot expert. More importantly, its quick-drying nylon and triple-reinforced stitching technology provide reliable safety (such as a 180 kg load capacity), meaning you can focus on enjoyment rather than worry.
Explore the freedom of the outdoors: [Find Your Perfect Ultralight Travel Hammock Here]
Advanced Tips: From “Able to Hang” to “Hanging Well”
Mastered the basics? Here are some small tips to upgrade your experience:
- Diagonal Lying Method: Want to lie flatter? Try lying diagonally, with your head and feet pointing toward opposite corners. You’ll find your body becomes much flatter, like sleeping in a real bed.
- Height Adjustment: If you plan to stay overnight, hang it slightly lower for safer entry and exit. For a daytime nap, hang it higher for a better view.
- Anti-Slip Tip: If you feel insecure the first time, place a small bag or rolled-up clothes on either side of your body to increase a sense of lateral security.
Magic Moment: How to “One-Click Store” Elegantly?
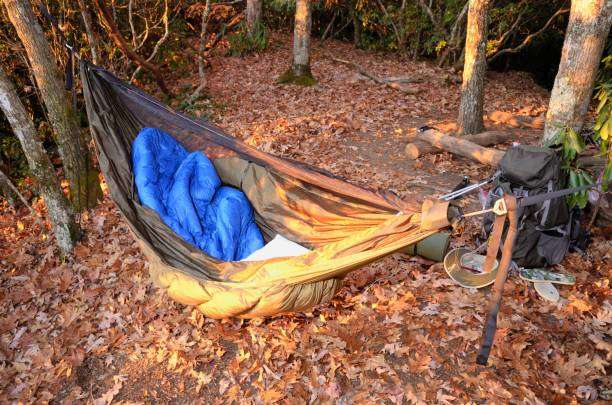
The sense of achievement from setup shouldn’t be destroyed by a terrible storage experience. Many people love hammocks but hate packing up, eventually stuffing everything into a messy ball that becomes a disaster the next time it’s opened.
Storage can be just as elegant as setup. Here is the classic “sushi roll” method:
- Untie one end of the hammock and lay it flat.
- Start from the end with the buckle and roll it up tightly like a sushi roll, including the suspension ropes.
- By the end, you will have a neat cylinder.
- Wrap the tail of the rope around the cylinder to secure it, or stuff it directly into the portable bag.
For ultralight travel hammocks, this is even more satisfying: the storage volume is so well-designed that it can be smaller than a water bottle. This means you can easily toss it into a backpack side pocket or hang it on a strap, truly achieving the freedom of “lying down anytime, anywhere.”
Frequently Asked Questions (FAQ)
|
Problem |
Solution |
|---|---|
|
Ropes always knotting or messy |
Always straighten the ropes before storing. Spend 30 seconds untangling them before rolling. This saves 10 minutes of frustration later. |
|
No trees available |
Use a dedicated hammock stand for balconies. On road trips, use roof racks or trailer hitches combined with a trekking pole. |
The hammock tilts to one side |
Check the height of the anchor points. Ensure they are on the same horizontal level. Adjust the rope on the higher side slightly. |
Conclusion: Care is an Extension of Love and Wisdom
Living with an outdoor hammock is like meeting an easy-going old friend—no need for red tape, just master the simple way of getting along, and it will reward you with infinite relaxation and joy. Setup and storage are not technical hurdles to overcome but a pleasant ritual leading to that floating leisure.
A thoughtfully designed, easy-to-operate outdoor hammock is valuable precisely because it lowers the barrier to enjoyment and raises the quota of happiness. It makes you want to take it out more often because you know a beautiful break only takes the time of two trees and one song to build.
So, stop letting that ball of rope and fabric sit in the storage room. Use the simple steps learned today to rediscover the fun of hanging. When you are skilled enough to do it with your eyes closed, you will understand that true relaxation starts the moment you untie the knot.
Get started with an easy outdoor hammock setup system for hiking and travel, featuring quick-hang straps and a tangle-free storage design.